
Last summer, we almost pitched our tent beneath a dead cottonwood that came down two hours after sunset—a close call that taught us plenty. Here’s the thing: determining campsite safety isn’t complicated, but it demands your attention during daylight hours when you can actually see what you’re dealing with. We’ve learned the hard way that a seemingly perfect spot can hide serious hazards. So what makes a campsite genuinely safe when darkness falls?
Key Takeaways
- Inspect overhead hazards like dead branches and unstable trees that could fall during storms or high winds at night.
- Evaluate ground stability and drainage patterns to avoid low-lying areas prone to flooding or water accumulation during rainfall.
- Assess recent animal activity through tracks, scat, and disturbed vegetation to determine if wildlife poses a safety concern.
- Ensure adequate visibility and security by using reflective markers, glow sticks, and establishing clear perimeter boundaries around camp.
- Position tents on flat terrain at least 15 feet from large trees and 200 feet from water sources for safety.
Inspect the Campsite During Daylight Hours

Before you even think about pitching your tent, you’ll want to do a thorough walkthrough of your potential campsite while the sun’s still up—because what looks fine in twilight can hide all sorts of problems. We’ve learned this the hard way.
Start by inspecting the ground for stability. Avoid low spots where water collects; they’re breeding grounds for mosquitoes and potential flood zones.
Look up constantly—scan for widowmakers, those dead branches hanging overhead that’ll drop without warning. Check tree health too. We steer clear of beech trees; their massive limbs aren’t worth the risk.
Scout your cooking area’s location, keeping it 15 feet minimum from sleeping zones. This distance substantially reduces wildlife encounters.
A well-equipped first aid kit nearby ensures you’re prepared for any minor injuries that might occur at your campsite.
Trust us: daylight reconnaissance prevents nighttime hazards and guarantees genuine safety.
Evaluate Terrain and Ground Stability
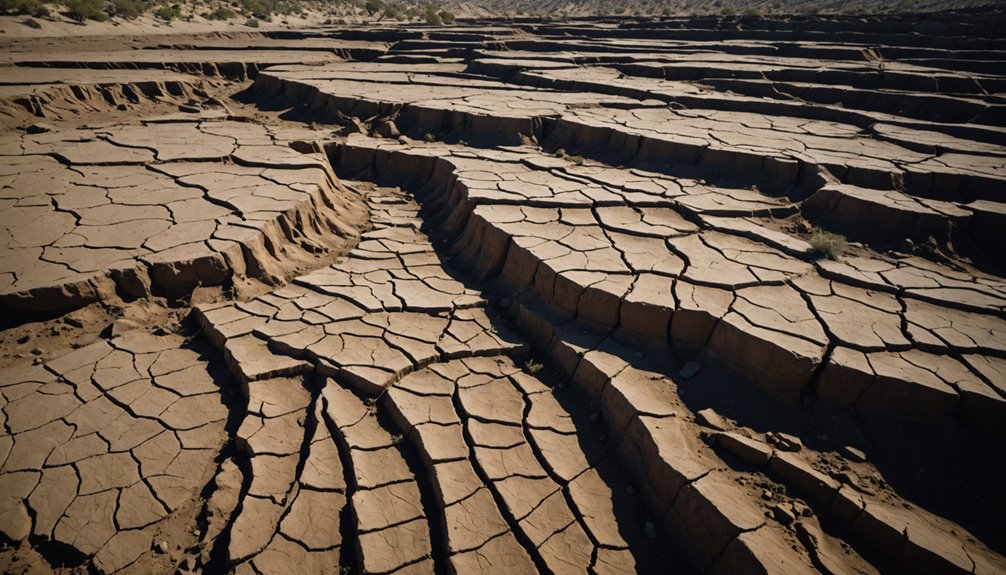
Solid ground is everything—we’ve learned this after spending a miserable night with our tent slowly sinking into what looked like firm earth. When you evaluate terrain for safe camping, staying aware of drainage patterns saves you from soggy sleeping bags and worse.
Press your boot firmly into suspect areas; if it squelches or leaves a deep impression, that’s mud territory—skip it.
We check slopes carefully for loose rocks and erosion signs that could trigger landslides or create nasty tripping hazards in darkness. Look for natural windbreaks like dense vegetation or hillsides; they’re game-changers during storms.
Flat ground matters—uneven surfaces wreck sleep quality and increase nighttime injury risks. For rocky terrain specifically, ensure your tent stakes are twisted or spiral designs that can properly anchor into hard ground and prevent your shelter from shifting during the night.
Ground stability isn’t negotiable. Scout thoroughly, trust your instincts, and move camp if something feels off. Your safety depends on it.
Assess Overhead Hazards and Tree Safety
Dead branches hanging overhead—what we call “widowmakers”—are silent assassins waiting for the next gust of wind or storm to come crashing down on your tent.
We’ve learned this lesson the hard way.
When evaluating overhead hazards, scrutinize tree health carefully. Rot, decay, and leaners signal danger.
We look for structural weakness—discoloration, missing bark, hollow sounds. Beech trees deserve extra caution; their heavy branches snap without warning.
Here’s our camping safety tip: position your tent at least 15 feet from large trees. That distance matters.
We also scan for dead wood clinging to living branches—those fall unpredictably.
Check tree stability by observing their angle. Straight trees stand resilient. Leaning ones? That’s your evacuation signal.
Similar to how riders assess grip and control when selecting equipment for their activities, campers must evaluate terrain and environmental factors for safety.
Trust your instincts. Dead wood kills. Respect that reality.
Check for Signs of Recent Wildlife Activity
Three types of evidence tell us whether wildlife’s been visiting your campsite: tracks, scat, and signs of feeding.
We’ve learned that checking for signs of wildlife activity requires patience and observation. Here’s what to look for:
- Animal tracks in soil or mud — fresh paw prints or hoof marks indicate recent visits and help us assess safety zones
- Scat (droppings) near your tent — signals animals have passed through and may return, so relocate if you find substantial amounts
- Disturbed vegetation or gnawed plants — shows where deer, rabbits, or bears have foraged nearby
- Nests or burrows in the area — reveals small animal presence and potential encounter risks
We’re aware of our surroundings by listening too—rustling leaves or animal calls prompt immediate reassessment.
Avoid attracting wildlife by securing food properly and maintaining distance from these signs. Additionally, using insect repellents can help minimize encounters with disease-carrying insects while you monitor for larger wildlife activity. Your vigilance keeps everyone safe.
Examine Water Drainage and Flood Risks
While wildlife concerns keep us alert during daylight hours, water damage poses a silent threat that can strike any time it rains—sometimes when we’re sound asleep.
We’ve learned the hard way that examining water drainage separates disaster from dry nights.
Start your terrain assessment by spotting erosion patterns and runoff paths—nature’s roadmap showing where water flows. We avoid low-lying valleys and riverbanks; they’re natural collection points.
Look for flattened grass and debris indicating previous flooding. Position your safe campsite at least 200 feet from water sources, and prioritize slopes that naturally channel water away from your tent. For additional protection of your gear, consider using waterproof dry bags to keep essential items safe from water damage even if unexpected flooding occurs.
We’ve discovered that flood risks aren’t random. They’re predictable when you know what to notice.
Trust the land’s history—it never lies.
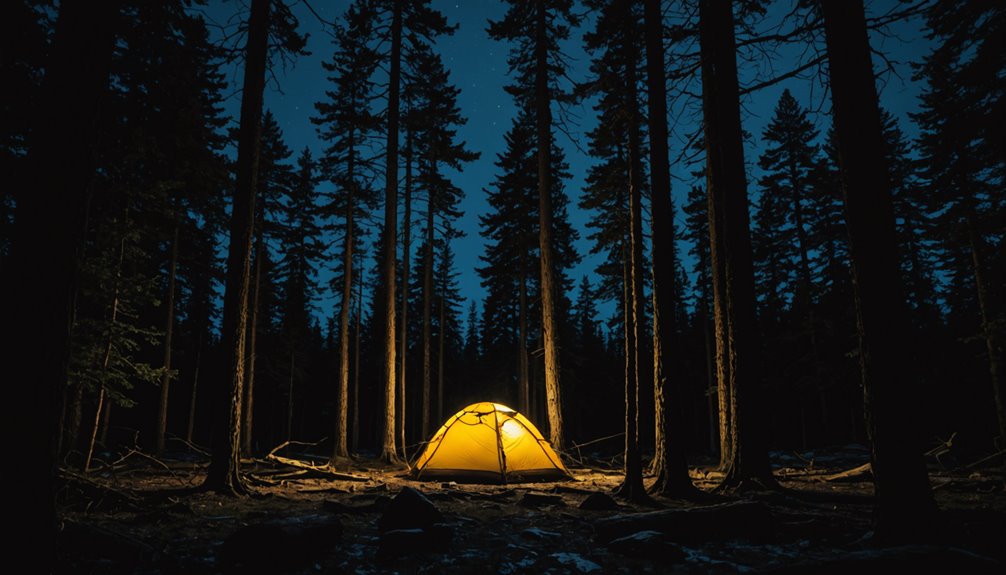
Ensure Adequate Lighting and Visibility
Two critical moments define every camping trip: sunset and the hours that follow. We’ve all fumbled through darkness, tripping over tent stakes—so let’s prevent that nightmare.
Adequate lighting transforms your campsite from hazardous to functional. Here’s what we recommend:
- Headlamps and lanterns provide hands-free illumination for cooking and steering safely.
- Solar-powered path lights create gentle visibility without disrupting nocturnal wildlife.
- Adjustable brightness settings with red mode preserve your night vision while maintaining awareness.
- Reflective tape on tent lines and gear eliminates tripping hazards immediately.
We’ve learned that visibility isn’t luxurious—it’s essential. Mark everything with glow markers. Consider that power management strategies similar to those used in outdoor GPS devices can help extend the battery life of your lighting equipment throughout the night.
Keep backup glow sticks handy because primary lights fail when you need them most. Your campsite’s safety depends on smart illumination choices that balance functionality with environmental respect.
Verify Distance From Cooking and Food Storage Areas
Every seasoned camper we’re familiar with has a story about the midnight visitor—the raccoon that ransacked their cooler or the bear that investigated their tent because food smells wafted through camp.
We’ve learned the hard way that distance matters.
Verify distance requirements rigorously: keep your tent at least 15 feet from cooking areas and food storage sites. Better yet, establish cooking areas 100 feet from sleeping zones—that’s roughly a football field away.
We’re not exaggerating; this separation dramatically reduces wildlife encounters.
Use bear-proof containers or hanging methods for food storage, keeping everything organized and clean. Promptly dispose of scraps.
Mark pathways with reflective tape or glow sticks to guide you safely between zones, similar to how quick-setup features enhance outdoor experiences by improving visibility and user experience.
These practical steps transform your campsite into a genuinely safe haven at night.
Look for Natural Windbreaks and Shelter
Once you’ve got your food sorted and your zones mapped out, there’s another threat that’ll wreck your night just as fast as any midnight visitor—wind.
We’ve all been there: tent flapping like an injured bird at 2 a.m., your sleeping bag feeling like a wind tunnel.
Here’s how we find safe shelter:
- Scout terrain features—hills, rock formations, and dense tree clusters naturally block gusts and create calmer microclimates
- Assess tree health carefully—dead branches pose real dangers, so choose areas with smaller, younger trees instead
- Position strategically near natural windbreaks—you’ll sleep warmer and safer when cold winds can’t penetrate your camping zone
- Verify shelter before dark—walk the perimeter and feel where wind actually hits versus protected pockets
Natural windbreaks also provide better insulation, which means your lightweight sleeping gear will perform more effectively by trapping warmth without requiring additional weight in your pack. This strategic positioning transforms your camping experience from miserable to genuinely restful.
Test Communication and Emergency Equipment
Nothing ruins a camping trip faster than realizing your emergency gear doesn’t work when you actually need it—we’ve learned this the hard way.
Before you pitch your tent, test communication devices like two-way radios and GPS to verify they’re functioning properly. We always carry a fully charged portable power bank because dead batteries won’t save you in a case of an emergency. Portable power stations with multiple port options ensure you can charge various communication devices simultaneously during extended camping trips.
Here’s the thing: a whistle costs almost nothing and works everywhere—no batteries required.
Familiarize yourself with local emergency services contact information, storing it both digitally and on paper. Practice using your personal locator beacon beforehand so you’re not fumbling during an actual crisis.
These steps aren’t glamorous, but they’re how you stay safe and maintain genuine peace of mind while exploring the wilderness.
Establish a Security Perimeter Around Your Tent
While you’re settling in for the night, your tent becomes your sanctuary—and like any sanctuary, it needs boundaries.
We’ve learned that establishing a security perimeter transforms how safe you’ll actually feel out there.
Here’s what we recommend for staying safe:
- Mark your perimeter with reflective tape or glow sticks to enhance visibility and create a visual barrier that deters wildlife
- Position gear and food at least 15 feet away from your sleeping area—this distance considerably reduces nighttime encounters
- Install noise-making devices like bells or wind chimes around your tent to alert you of movement
- Choose a safe location with clear sightlines to your surroundings, minimizing surprise encounters
Keep your flashlight within arm’s reach, and consider keeping reflective emergency blankets accessible as backup signaling devices if you need to attract rescue attention.
We can’t overstate how fire safety measures and proactive setup choices protect you when darkness falls.
You’re not just camping—you’re reclaiming control over your nighttime security.
Frequently Asked Questions
What Is the 3-3-3 Rule for Camping?
We embrace the 3-3-3 Rule: arrive three hours before sunset, maintain three miles from civilization, and practice three safety measures—storing food away, keeping our campsite clean, and carrying signaling equipment to prevent campsite hazards and nighttime wildlife encounters.
How Do You Know if a Campsite Is Safe?
We’re free to assess safety by choosing elevated campsite locations away from hazards, understanding local wildlife encounters, maintaining fire safety distance, and installing lighting options like glow sticks. We’ll break chains of negligence through preparedness and smart positioning.
What Is the 200 Rule for Camping?
We follow the 200 Rule by positioning our campsite distance far from water sources and trails. We’re maximizing wildlife awareness, ensuring fire safety through proper spacing, and preparing our gear strategically—all liberating us to camp responsibly without harming nature’s delicate balance.
What Are the 7 C’s of Camping?
We’ve got the seven essentials: Check weather, Choose safe campsites with nighttime precautions, Consider gear, Carry supplies, Communicate plans, Conserve resources, and Clean up. We’ll master wildlife awareness and emergency preparedness to camp freely and responsibly.
Conclusion
We’ve built our campsite safety like constructing a fortress—layer by layer. By inspecting during daylight, securing our perimeter, and keeping food distant, we’ve transformed nighttime anxiety into confidence. You’ll sleep soundly knowing you’ve checked every box. We’re not paranoid; we’re prepared. That’s the difference between camping and truly enjoying it. Follow these steps, and you’ll wake refreshed—not startled.

")

