
Most of us grab a headlamp without thinking—we slap it on and wonder why we’re squinting—but here’s the thing: a properly fitted headlamp transforms how you navigate darkness. We’ve learned this the hard way, through countless camping trips and late-night repairs where poor positioning meant compromised visibility and neck strain. The difference between a headlamp that works and one that actually works comes down to fit, beam selection, and maintenance habits most people skip entirely.
Key Takeaways
- Ensure headlamp sits snugly above eyebrows with adjusted straps distributing weight evenly across your head.
- Toggle between wide floodlight for close work and narrow spotlight for distance navigation based on task.
- Use low beams in urban areas and adverse weather to prevent glare while maintaining visibility.
- Switch to high beams on open roads for 350-400 feet visibility, dimming for oncoming traffic.
- Check battery levels and clean contacts monthly, replacing batteries per manufacturer guidelines for reliable performance.
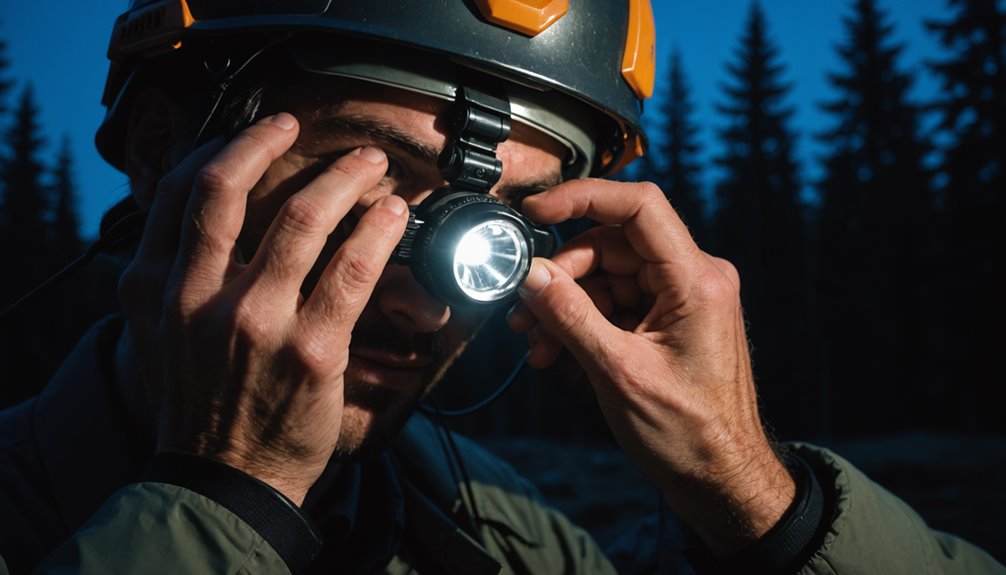
Proper Headlamp Fit and Comfort

The foundation of any good headlamp experience is, frankly, getting it to actually stay put—and we’ve all been there, watching our light drift downward mid-hike like some sort of forehead-mounted meteor.
Make sure your headlamp sits snug but not strangling-tight across your head. We adjust the headband to distribute weight evenly, preventing those annoying pressure points that’ll drive you nuts after an hour.
Most modern headlamps feature adjustable straps—your secret weapon for customizing fit across different head sizes and hairstyles. Position yours just above your eyebrows, keeping your Low Beam Headlights functionality clear and unobstructed.
Here’s the reality: worn straps and padding compromise both comfort and security. Check them regularly, replacing damaged sections before they fail you mid-adventure. A properly fitted headlamp becomes invisible—literally and figuratively. Look for headlamps with soft, breathable materials to prevent chafing during extended wear on the trail.
Adjusting Beam Angle for Optimal Illumination
Once you’ve got your headlamp sitting comfortably on your head, it’s time to dial in the beam angle—because pointing light everywhere equally is like shouting when you need to whisper.
Most modern headlamps let you toggle between a wide floodlight for close work and a focused spotlight for distance.
We’ve found that beam angle adjustment makes a real difference in different conditions. Narrow your beam in fog or rain—you’ll cut through scatter better than blasting full floodlight everywhere.
For glare reduction techniques, keep that light level and secure. Misalignment ruins everything.
Your visibility enhancement strategies should match your task: wide beam for tent setup, narrow beam for trail navigation ahead.
Check your alignment regularly, especially after impacts or storage. Small adjustments compound into serious visibility wins. Bright front and rear lights reduce accident risk significantly, making proper beam angle adjustment critical for safe commuting and outdoor activities.
Using Low Beam Settings in Close Proximity

Most headlamp users we’ve worked with don’t realize that dialing down to low beam settings is where the real control happens—particularly when you’re maneuvering tight spaces or working near other people.
Low beam advantages become immediately obvious: you’ll illuminate roughly 200 feet ahead without overwhelming those around you. When you’re steering through urban driving situations or streetlit areas, low beams are your liberation tool—they prevent that annoying glare that blinds oncoming drivers and creates tension.
We’ve found reducing glare actually makes encounters smoother, less stressful for everyone involved. In adverse weather—fog, rain, heavy snow—low beams cut through low-visibility environments better than high beams because their downward-directed light works with conditions rather than against them. For outdoor activities like hiking or nighttime sports, pairing your headlamp with physical barriers for eye protection such as UV-protective sunglasses can further reduce eye strain and discomfort.
Regular maintenance keeps them performing reliably. You’re fundamentally gaining control and consideration simultaneously.
High Beam Usage for Open Road Conditions
When you’re driving alone on a dark, empty highway—that’s where high beams truly shine.
We’ve all felt that freedom of pushing visibility out to 350-400 feet ahead, spotting potential hazards before they become problems. Rural road hazards like deer or debris demand this extended sightline. High beam benefits go beyond distance; they’re your best defense against nighttime visibility challenges on unlit stretches.
Here’s what we’ve learned: switch to low beams immediately when headlights appear ahead—blinding oncoming drivers defeats the purpose of safe driving.
Properly adjusted beams make all the difference. We maintain ours religiously, checking alignment annually because poorly adjusted lights waste their potential, much like how offline map downloads require proper management to prevent screen failures during critical navigation moments.
Open roads reward responsible high beam use. You’ll spot wildlife, potholes, and obstacles earlier, giving yourself precious reaction time.
That’s genuine control.
Battery Maintenance and Functionality Checks
Because a dead headlamp is basically a paperweight, we’ve learned that battery maintenance isn’t optional—it’s foundational. We check our battery levels regularly and replace them following manufacturer specs to keep brightness consistent. Here’s what we’ve discovered works:
| Maintenance Task | Frequency | Battery Lifespan Impact |
|---|---|---|
| Check battery level | Before each use | Prevents mid-adventure failures |
| Clean contacts | Monthly | Eliminates corrosion buildup |
| Replace batteries | Per manufacturer guide | Maintains peak performance |
| Store spares properly | Ongoing | Keeps backups functional |
| Conduct functionality testing | Weekly | Catches issues early |
We store spare batteries in cool, dry spots—corrosion prevention matters enormously. When we test settings (low and high beam), we’re actually protecting our freedom to explore confidently. Clean battery contacts? Non-negotiable. Better conductivity equals better reliability, and that’s liberation we can depend on. Higher brightness settings will reduce battery life significantly, so adjusting your output based on riding conditions helps extend runtime between charges.
Safety Considerations for Nighttime and Adverse Weather
As your headlamp becomes your constant companion in darkness, we’ve learned that proper technique matters just as much as the gear itself.
Headlamp brightness control isn’t just about seeing better—it’s about respecting shared spaces while freeing yourself to explore confidently.
In rain or fog, we dial down to low beam settings, minimizing glare effects that bounce off moisture and blind us more than help. Trust us: that counterintuitive move actually works.
On mountain trails at night, we keep our lamps adjusted slightly downward, illuminating ten to fifteen feet ahead without washing out terrain details.
Here’s what we’ve discovered through trial and error: frequently scanning surroundings catches obstacles before they trip you.
Check battery levels before ventures. That five-minute inspection prevents frustration miles from civilization, keeping your freedom intact.
For nighttime riding, consider that rear light helmets significantly reduce crash risk and enhance visibility for both you and approaching drivers without requiring additional gear attachments.
Frequently Asked Questions
How to Correctly Aim Your Headlights?
We’ll help you master headlight adjustment techniques to achieve proper aim benefits and avoid common aiming mistakes. We’re freeing you from dangerous misalignment by parking 25 feet from a wall, marking axis lines, and adjusting your headlights’ alignment points accordingly for ideal road safety.
What Are the Three Lights in Headlights?
We’ve got three headlight types to master: low beams that control light intensity for standard driving, high beams that expand beam patterns for extended visibility, and daytime running lights that liberate us from invisibility. Each serves distinct purposes for our freedom on the road.
What Are Signs of Headlight Misalignment?
We’ve identified several signs you should watch for: beams aimed too high or low, uneven road illumination, and cutoff lines that don’t align properly during testing. It is understood that suspension changes and impacts cause misalignment, severely compromising your visibility and safety on the road.
At What Distance Should You Dip Your Headlights?
We dip our headlights within 500 feet of oncoming vehicles. We’ll adjust that headlight angle to reduce brightness comparison and maintain distance visibility tips, freeing ourselves from blinding other drivers and reclaiming safe, responsible road freedom.
Conclusion
We’ve covered the essentials—and honestly, mastering your headlamp’s like tuning an instrument. Get the fit right, toggle your beams intentionally, and you’ll navigate darkness safely. We can’t stress battery checks enough; dead contacts have left us stranded more times than we’d like admitting. Follow these practices, stay consistent with maintenance, and you’re golden. Your headlamp’s reliability depends entirely on the attention you give it now.


